Comet
Tank MK1
Back
![]()
Kit
: Comet tank
Manufacturer
: Matchbox
Scale
: 1/76
Type
: Injection moulded
Paint
: Humbrol, Revell, Vallejo
Accessories
: Scratch
: PE exhaust grille from Part
: Evergreen strips
Reference material : Profile
AFV weapons n° 25 – Cromwell and Comet
: Internet
History:
If the Cromwell tank can be considered as the successor of the Cruiser and Crusader tanks, so can the Comet tank be considered the successor of the Cromwell.
Main difference between the two tanks was the armament with a new and more powerful gun in a new turret. The fact that the turret of the Cromwell could block the drivers exit was eliminated with rollers in its chassis. The Comet arrived just in time to participate in the last battles of WWII and it stayed in service with several armies until the late fifties. For some strange reason, not much documentation is available on this tank and as far as I know only one kit, the Matchbox one, has ever been r
It also was the first of the series of Cruiser tanks that got retur
eleased.
It seems that the Comet’s tracks often broke and some did blame the return rollers for it but tests of this tank without the return rollers showed that they were not to blame. The Comet was loved by its crews and a few tanks survived.

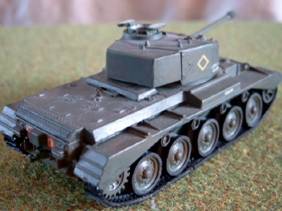
kit cover
The kit:
It is one of the first kits ever released by Matchbox in 1974 and the kit I will work on was build by me around that period, straight-from-the-box and without having any idea of the building techniques I know today.
The fact that the Comet was the successor of the Cromwell let me decide to rebuild this Comet using the painting experience gained with the building of the Cromwell.
Matchbox always provided 2 colour options and decals and I was able to retrieve this second set in de decals spares box.
I am not aware of the existence of a PE set for this kit. All improvements and details were made scratch with the exception of the new grilles that were cut from a piece of PE from one of the first PE sets released by Part.
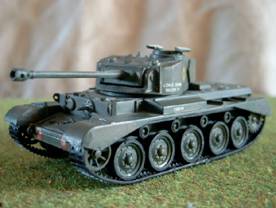
2 pictures of the old model build around 1974
Construction:
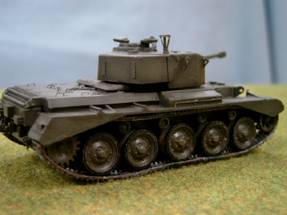
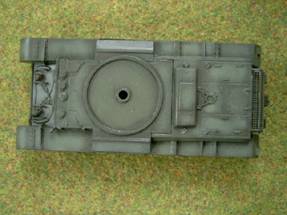
I had build this tank before and so, in stead of building, I had to dismantle it. The Comet’s tracks are bad and it was a tough job to detach them without damaging them. I also detached as many small parts as possible like machine guns or hatches because I wanted to avoid loosing them when breaking off. The wheels came off without breaking and that made the dismantling of the tracks much easier. Those tacks are from the type where you must hook them together before gluing. The body part released the chassis as well as the turret without damage.
A night spend in a bag with oven cleaner removed most of the paint and the old decals.
The grips on the hatches are only represented by small strips of plastic. I drilled holes at both ends of each of them and then cut the plastic parts off. The new handholds were made from fine copper wire bend with the aid of an Etch Mate. Once in place, they were glued using super glue.
The hatches of the turret got new handholds as well as the hatches of the driver and radio/MG gunner. A lot of work for a minor result but one can see that there are handholds on the hatches and it is this detail that makes the difference on 1/72-1/76.
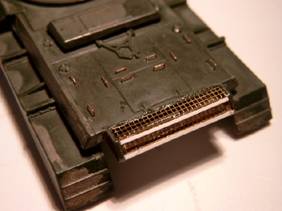
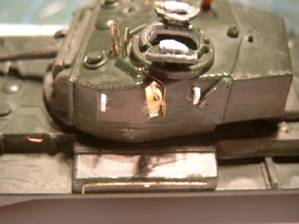
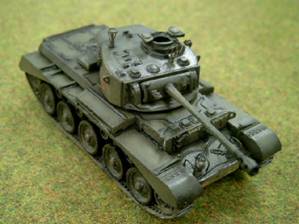
Detail on rear plate
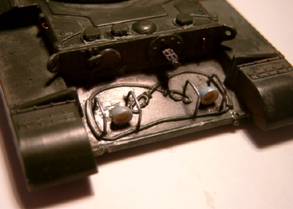
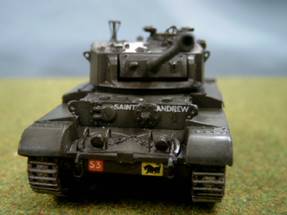
The front panel receives a straight standing hand grip between MG gun and the left side. The headlights in the kit are totally unusable and are replaced by items from the spares box. These were, just like on the Cromwell, protected by steel bars. I drilled holes in the body, made bars from wire and glued them on with super glue. New information showed that those headlights had covers over them; the right one a full cover and the left one a cover with a cap, the forerunner of the Nato light.
The open hatches of the commander get a cushion made from Milliput and are sealed with Zap-A-Gap.
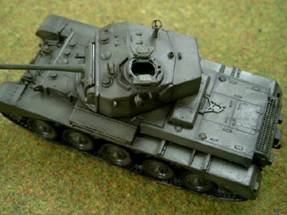
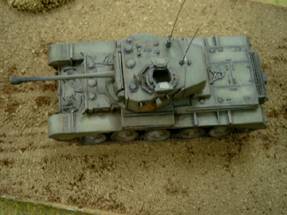
The Comet was an improvement on the Cromwell whereby the turret got a different shape so that it could not block the driver’s hatches. These hatches were replaced by sideway opening doors as found on the latest mark Cromwell’s.
Front plate detail
The machine guns in turret and hull and the towing eyes in the front and back of the tank were drilled out. Towing loops are made from metal wire. Four new lifting eyes on the turret need to be scratch build.
The exhaust comes in the form of a poorly shaped grille making part of the upper hull structure of the kit. You can do two things: or you construct a cover over it like on the Cromwell or you replace that grille with a new one. Unlike the Cromwell, this grille is a two-part piece with a part lying horizontally and a grille bending downwards at about a 45° angle.
I was lucky enough to find an old Part PE set with only some mesh wire in it. The old Comet part was cut away and replaced by a piece of PE grille and some Evergreen strips. The underside also got a piece of plastic card in order to avoid the see-trough effect. Much better.
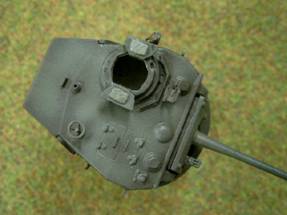
The cleaning-up of the turret also demands a lot of work.
The gun barrel needs cleaning-up but also to be drilled out at the breech. It even was necessary to use a bit of filler just behind the breech due to an ejector mark. The Comet had the same type of searchlight as the Cromwell on the left side of the turret. This light was scratch build using parts from the scrap box, plastic card and fine copper wire. It will receive a drop of silver paint and Kristal Klear.
A same type antenna mast as on the Cromwell must be constructed from copper wire and Evergreen rod.
The turret also has a blade vane sight on top of it. This has to be scratch build and I constructed this from fine copper wire bend using the Etch Mate in order to get straight corners. I glued this to a piece of recovered PE.
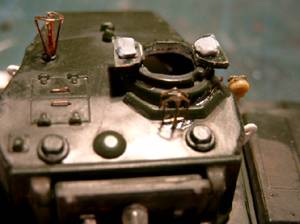
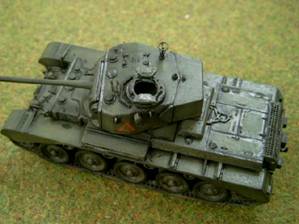
Turret and searchlight detail
The periscopes are of the good type with a cap on them but they must be adjusted because they are too narrow at the front. I cut off a slice of plastic and painted some mirrors on them.
I do not posses any clear shots regarding the rear fenders but I assume they were of the same type of the Cromwell. So, I added a couple of round reflectors on a piece of metal shaped to an inversed L form.
The black plastic tracks must be painted before they are put back in place again; best before the upper hull part is glued on again.
Painting:
I decided to use the gained experience on the painting techniques from the Spanish School with the main difference that I opted for a complete wash as a base coat. I have seen this technique being applied to different models in my club and I wanted to try it out.
The entire tank received a wash consisting of Raw Umber, Burnt Sienna and black oil paint diluted with turpentine. I must have used too much turpentine because it needed one week to dry.
Other paints used are from the Humbrol, Revell and Vallejo ranges.
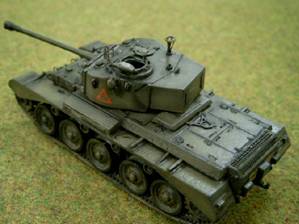
The first coat on the entire tank consisted of Vallejo Olive Drab mixed with Desert Sand in a 70/30 proportion. It does not give the lighter colour like on the Cromwell but results darker.
Vallejo olive drab + desert sand 70/30
In phase 2 a fine needle (0,2 on 1/35 and 0,15 on 1/72) was used to apply a form of post-shading. I used diluted Olive Drab an all deep lying and upstanding parts.
Meanwhile the tracks are painted rust as base colour followed by gun metal, a black wash and some dry brushing with polished steel. The Comet had no rubber on its tacks.
Post-shading with diluted olive drab
In phase 3 we use the base colour again (olive drab + sand) but in a 50/50 proportion and this only on flat surfaces, not on edges.
The wheels got their rubber tyres painted o and were than mounted on to the chassis.
This was followed by replacement of the tracks
Next came a coat of Klir (Future) and the decaling.
Phase 4 consists of spraying a coat of earth colour on the lower surfaces of the tank. I used Humbrol 89 ochre for this purpose and applied it on chassis and wheels.

Decals on.
After all this was thoroughly dry, I started with the washes or filters as called by the Spanish School.
A 1st wash consist of strongly diluted matt black paint that fills the crevasses and makes them jump to the eye. We have not the intention to give the entire tank a wash like that, only the parts where dust and dirt gather together.
Black wash
A 2nd wash is done with strongly diluted light green oil paint. This gives a good effect on the flat surfaces of the turret.
Light green oil paint wash
Wash 3 is made from strongly diluted raw umber. It is essential that one sees that it is there but it may not rule.

The 4th and last wash is made of burned sienna. Burned sienna lets suppose that there is some rust on the tank which is possible because these tanks did fight their way trough Germany.
All of this is followed by a coat of matt varnish.
Next came the details like gun metal on machine guns, red on reflectors and tail lights, white on the small headlights and black pastel powder around the gun mouth.
Finally came a coat of dust pastel powder, mainly on the lower hull sides.
Decals:
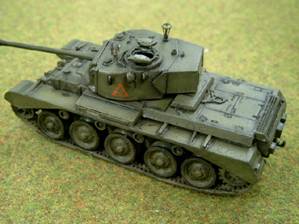
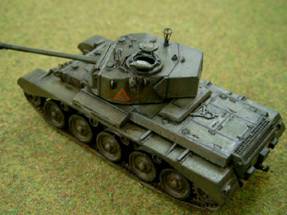
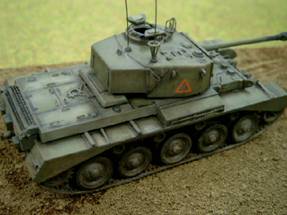
This tank is a restoration project so I had to fall back on the second set of decals as issued by Matchbox. I still had them in my decal spares box (never throw decals away). That way, the Comet became one of the 2nd Fife and Forfar Yeomanry, called “Saint Andrew”.
This tank carries British cockades but no Allied stars as recognition marks.
The decals were added with the help of Humbrol decal Cote 1 and 2 after which they were sealed with a coat of Klir (Future).
Conclusion:
The real one was only build in one Mark and in two sub-types, pre- and post WWII but used in many army’s around the world.
I had never thought of restoring the Comet until I had build the Cromwell using the painting techniques from the “Spanish School”.
I used them again and with good result, I think I will use them on all following Allied models.

The Comet is a long time neglected tank in our modelling world, as far as I know the Matchbox 1/76 kit is the only one around.
It is a nice looking kit that improves a lot when it gets extra attention by detailing, or by a good paint job.
I wonder if any after market producer would dare to issue a PE set or a detail set for the post-war version. Or how about a 1/35 version?
It’s a kit that can strongly be recommended to the absolute beginner as well as to the super detailer.
Keep ‘m building.
Erwin Bovyn
IPMS GENT
Belgium
![]()